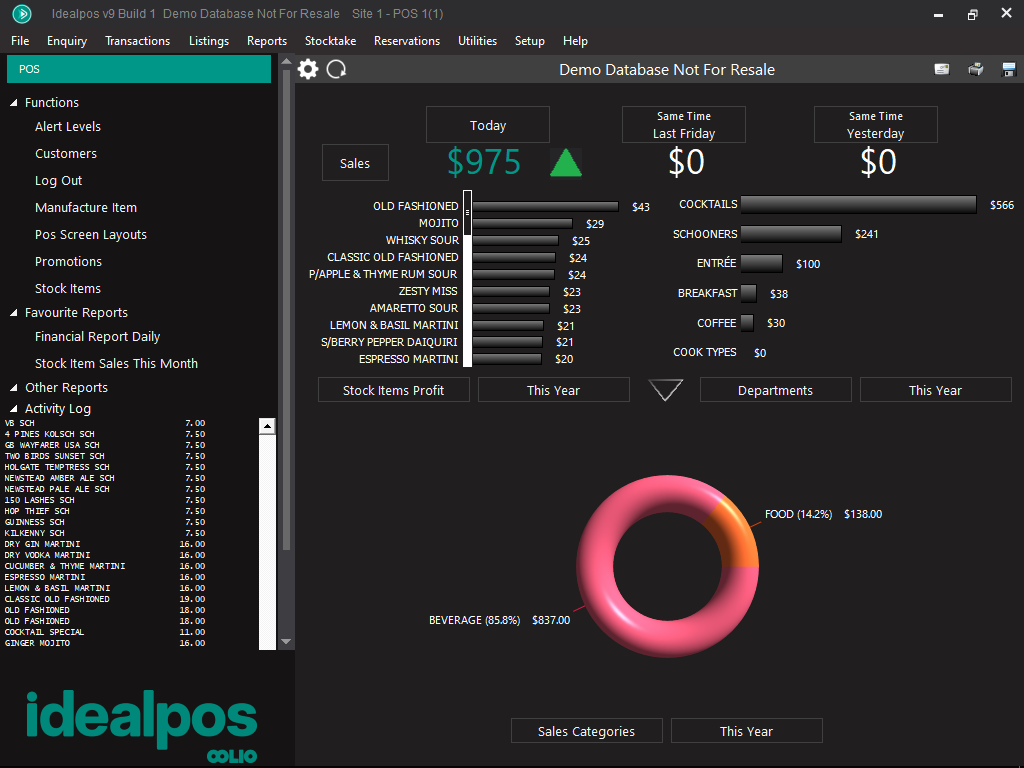
The Back Office is what Idealpos uses to allow access to the entire setup of the program.
It also provides access to the Menus, Dashboard, Shortcuts and Activity Log.
The Back Office is generally reserved for Admin Users, but permissions can be used on all functions to allow different Users access they require.
The Back Office can be accessed from the POS Screen by closing the POS Screen via the "X" button on the top-right corner.
If Idealpos is not licensed with POS in the registration, the Back Office screen will be the default screen displayed when the program opens.
This behaviour can also be controlled via the Yes/No Option "POS Screen Opens on Startup" (provided that the POS screen module has been enabled in the licence).
You have the option to expand the Back Office section of Idealpos to as large as you want.
The Back Office window will open to occupy the entire size of the screen (e.g. on a 1920x1080 resolution screen, the Idealpos Back Office window will open to occupy the entire screen).
Screens that only support a resolution of '1024x768' cannot be re-sized.
FIGURE 1-1: The Idealpos Back Office window shown at a resolution of 1024x768.
The default and smallest screen resolution that the Idealpos POS screen runs at is 1024x768.
On screens with resolutions greater than 1024x768, the POS screen is always displayed at the top left-corner of the screen (when the POS Screen Resolution is set to 1024x768 in Setup > POS Terminals > Modify > POS Settings > POS Screen).
When the Idealpos POS screen is opened, the Back Office screen is hidden, regardless if the Back Office screen has been resized to a resolution greater than 1024x768.
When exiting the POS Screen, the Back Office will be displayed, with the Shortcuts and Menus remaining in place.
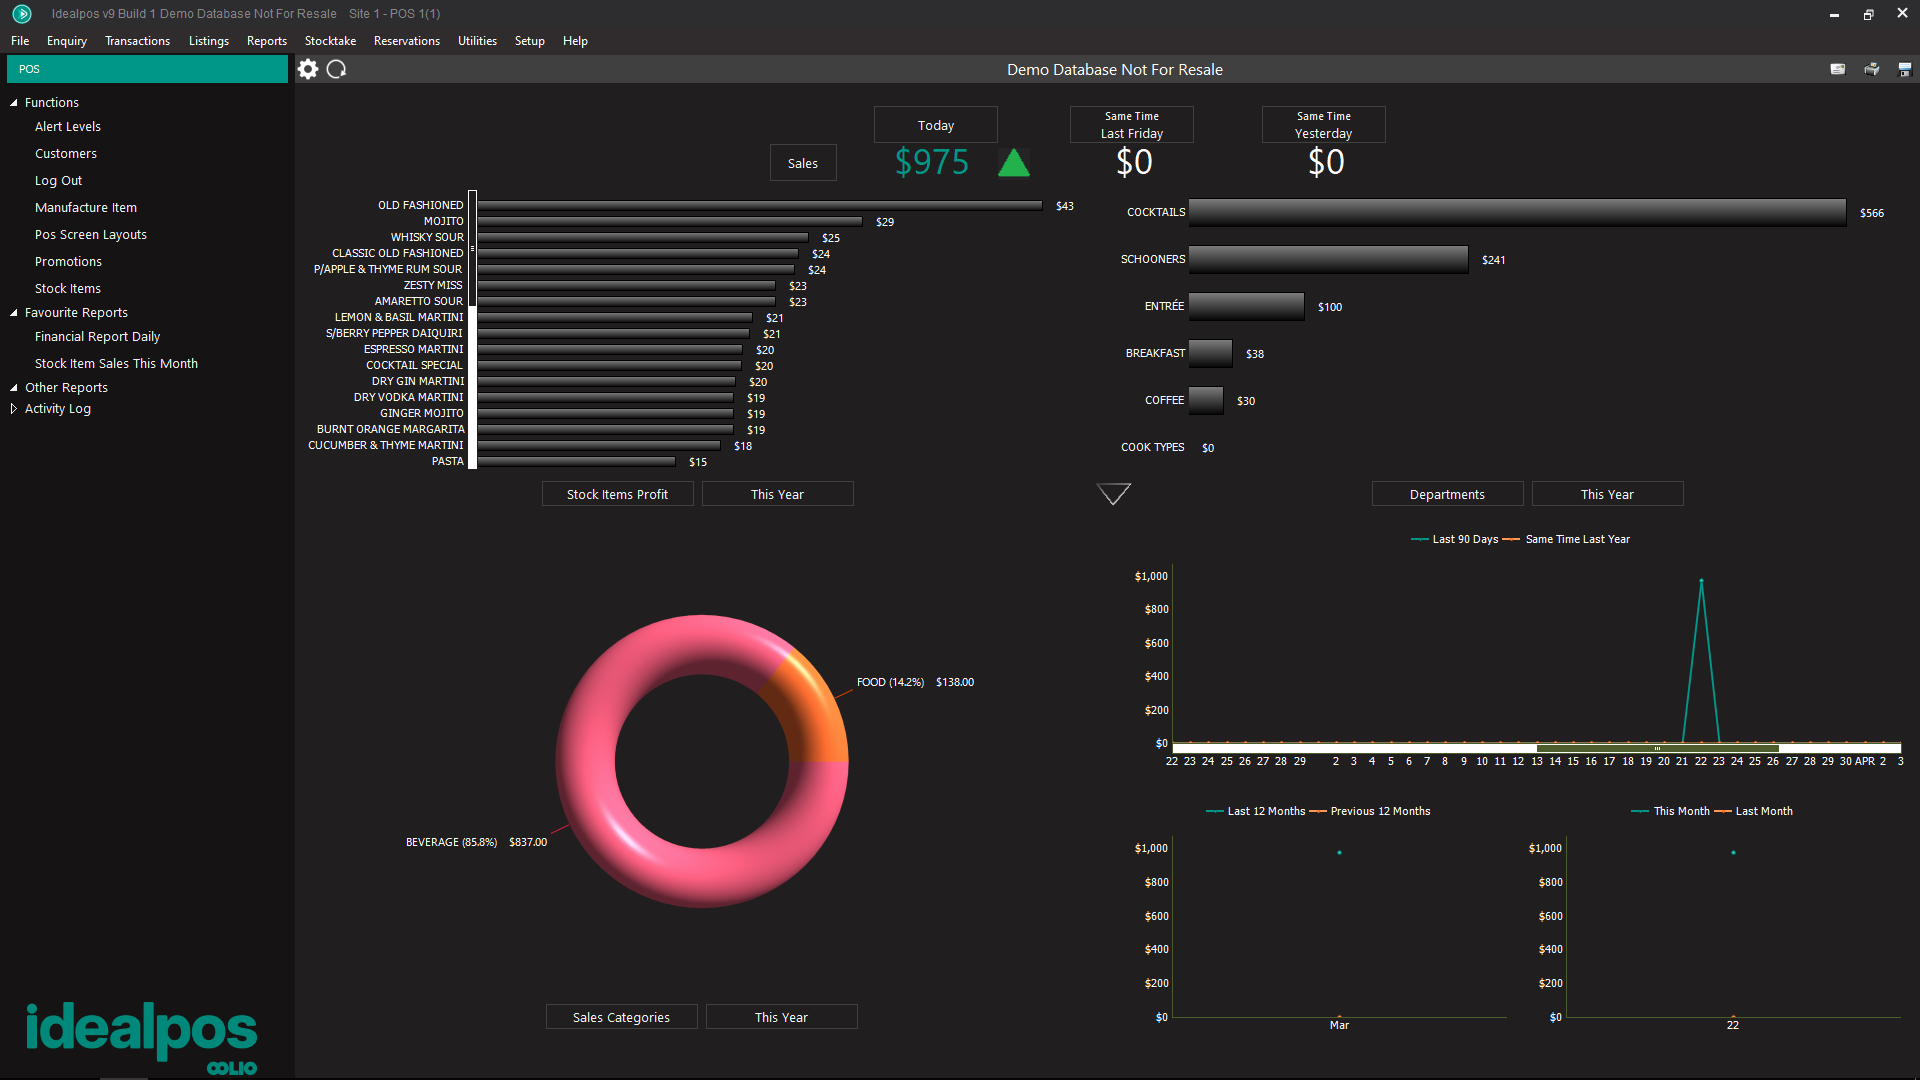
FIGURE 1-2: The Idealpos Back Office window shown at a resolution of 1920x1080.
For a full list of enhancements that are included in Idealpos v10 Build 1, click here.
Idealpos v10 is the successor to Idealpos v9.
The colours of the User Interface in v10 have been changed to reflect the Oolio brand which Idealpos is part of.
The Idealpos logo has also been updated; the Oolio brand is now the prominent part of the logo.
The Idealpos v10 User Interface is similar to the previous v9 User Interface; Buttons for saving changes and other actions are displayed on the left-hand side of most windows.
The below screenshot shows the Yes/No Options screen, which shows the new colour scheme.
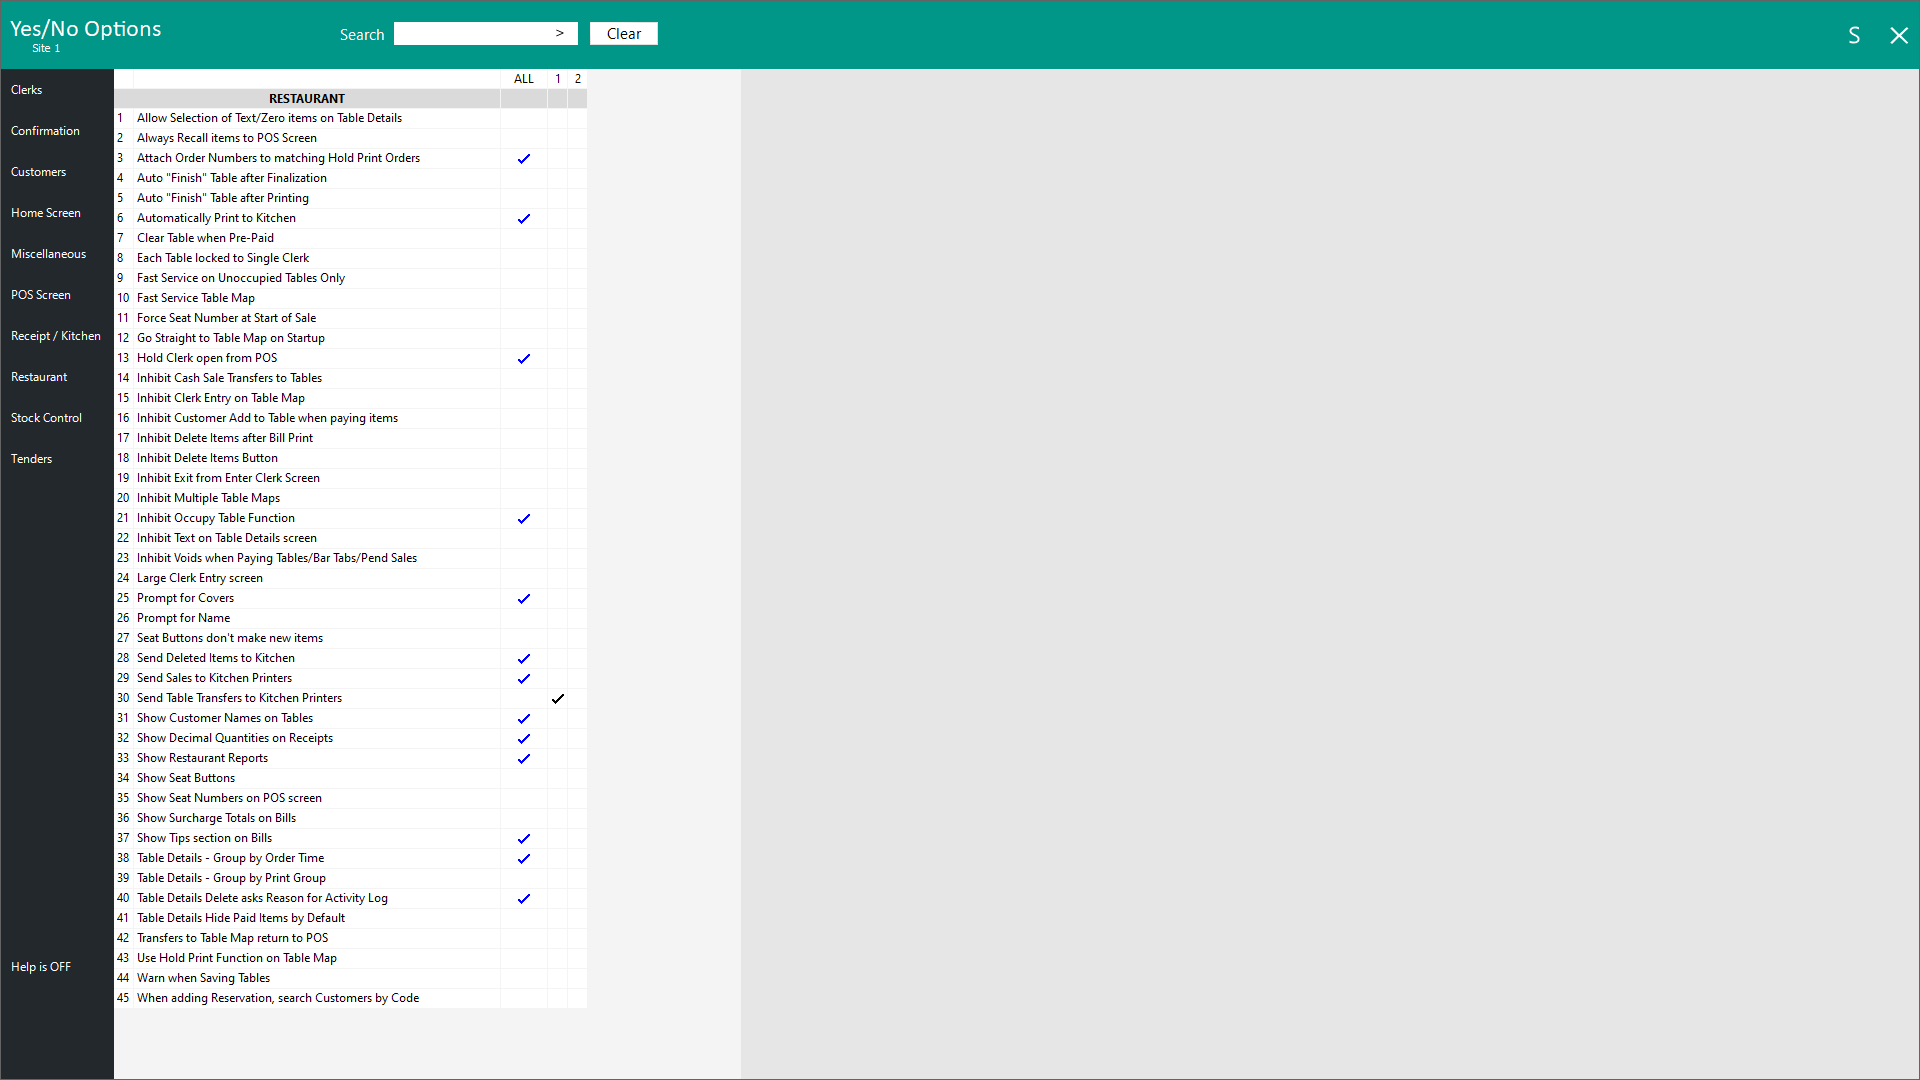
FIGURE 1-3: The Yes/No Options window.
Any unsaved changes made to an Add/Modify screen (a screen or window that allows you to add or modify records) will trigger a 'Save Changes' prompt to be displayed.
The prompt will appear if changes have been made and the window is closed using the "X" on the top-right corner of the window without pressing the "Save" button.
Examples of such screens include Adding/Modifying a Department, Sales Category, Promotion, etc.

FIGURE 1-4: An example of the "Save Changes?" prompt.
The old preview 'eye' icon that used to appear at the top of the title bar has been replaced with an export button.
The export button will appear at the top of any window which displays data (such as Customers, Stock Items, etc.).
This new button can be used to export the data currently displayed on-screen to a CSV file.
Access to the export button can be controlled via User Permissions (go to Back Office > Setup > Users > Select a User other than Admin > Modify).
Expand "Other" then toggle "Export CSV" as required.
When access to the button is disabled, a prompt "You do not have permission for this function" will be triggered when a user presses the button.
